
How To Install A Widespread Bathroom Faucet?
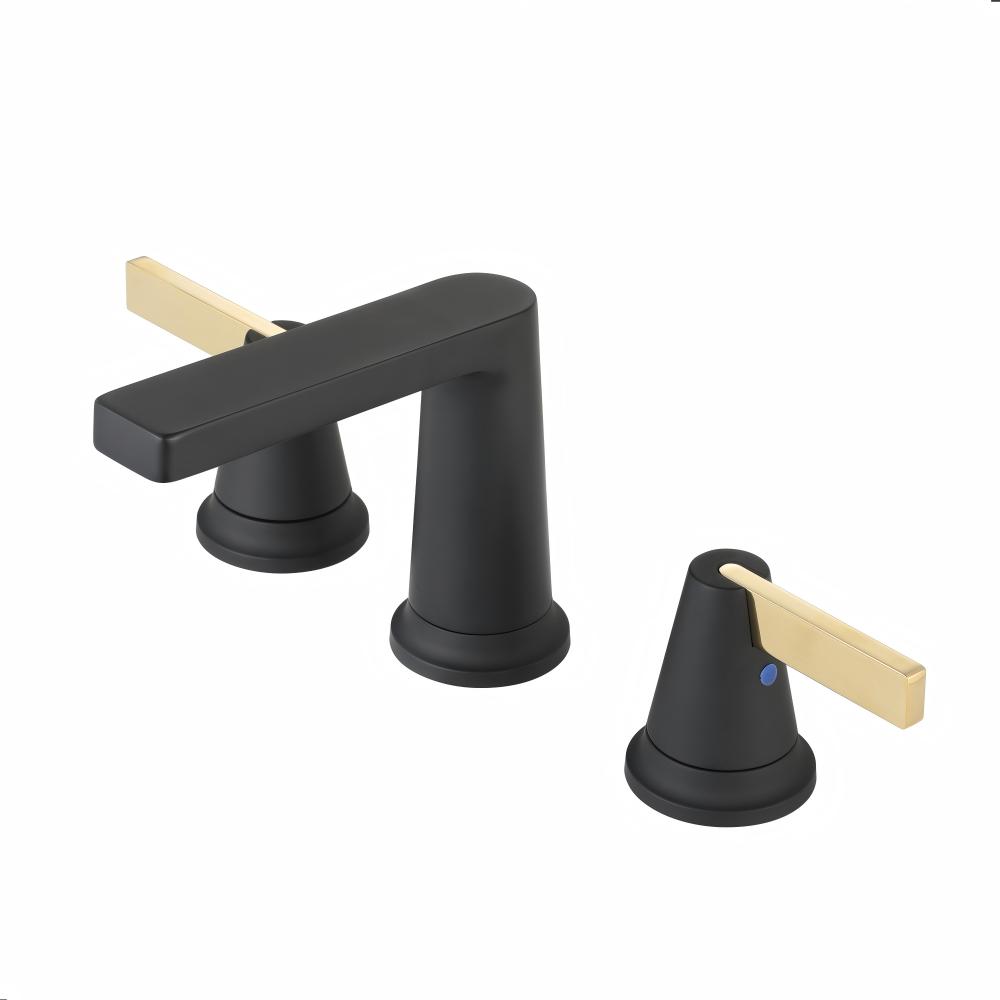
A widespread bathroom faucet is a three-piece setup with a separate spout and two independent handles. This design is popular for bathroom upgrades and project installations because it creates a clean, balanced countertop layout and allows more flexible handle spacing than compact faucet styles. When installed correctly, a widespread faucet delivers stable flow, smooth temperature control, and a tight seal at every connection point, which reduces the risk of leaks and after-sales maintenance.
If you are selecting a faucet for long-term use and export-facing projects, product consistency and compliance matter. DELICA has focused on sanitary ware manufacturing since 1985, and many product lines follow strict quality management systems and certification requirements used in different markets. You can view DELICA’s widespread basin faucet options for bathroom basins and countertop installations.
1. Confirm Compatibility Before You Start
A successful installation depends on verifying the sink and plumbing conditions before opening the box. Many installation issues happen because the faucet fits the hole pattern, but the under-sink conditions create stress on hoses or fittings.
Hole configuration and spacing
A widespread faucet typically uses three holes: left handle, spout, right handle. Measure the center-to-center distance between handle holes and confirm the spout hole is centered. Also confirm the hole diameter matches the faucet shanks and that the deck surface is flat. If the holes are slightly oversized, the faucet may shift during tightening, which often leads to a loose spout or handles later.Deck thickness and under-sink clearance
Check countertop thickness and cabinet layout. A thick stone countertop may reduce the available thread length for locknuts. Tight spaces can also prevent proper wrench access. If you cannot tighten hardware evenly, the faucet may tilt, causing the escutcheon to lift and water to seep under trim.Shutoff valves and water supply condition
Test the angle stops under the sink. Close them fully and re-open slightly to confirm they move smoothly. If valves feel stuck, leak around the stem, or show corrosion, replace them before faucet installation. A new faucet will not solve a weak valve seal, and many post-installation leaks are actually valve failures.Supply line reach
Ensure the supply lines can reach the shutoff valves without tension. If the line is too short, it will pull on the fitting and create a slow leak over time. If too long, ensure the loop does not kink or rub against sharp edges.
2. Tools and Materials Checklist
Having the correct tools reduces the chance of over-tightening or damaging parts in a tight cabinet.
| Category | What to Prepare | Practical Notes |
|---|---|---|
| Wrenches | Adjustable wrench, basin wrench | Basin wrench helps reach locknuts behind the bowl |
| Drivers | Phillips and flat screwdriver | For handle set screws and drain linkage adjustments |
| Sealing | Thread seal tape, plumber putty or silicone | Use only where required, too much sealant can cause shifting |
| Cleanup | Towels, bucket, soft cloth | Keeps cabinet dry and prevents slipping |
| Inspection | Flashlight, paper towels | Paper towel quickly shows micro leaks at joints |
| Optional | Small level or straightedge | Helps align spout and keep handles symmetrical |
3. Shut Off Water and Prepare the Work Area
Turn off the hot and cold shutoff valves
Rotate each valve clockwise until it stops. Then open the existing faucet to release trapped pressure and drain the lines. If the flow does not stop completely, the shutoff valve is not sealing and should be replaced before proceeding.Protect the cabinet and floor
Place towels under the supply connections and put a bucket beneath the trap. Even when shutoff valves are closed, water in the lines will spill when fittings are loosened.Organize components
Lay out spout, handle valves, escutcheons, gaskets, hoses, mounting washers, locknuts, handles, and any drain parts. Separating parts prevents mixing similar-looking washers from the faucet and drain kits.
4. Remove the Old Faucet and Clean the Deck
Removing the old faucet carefully prevents damage to the sink and gives you a flat sealing surface.
Disconnect supply lines at the shutoff valves
Use a wrench to loosen the coupling nut. Hold the shutoff valve body steady with your other hand so the valve does not twist and crack the pipe.Disconnect the drain linkage if present
If you have a pop-up drain, remove the clip, pull the pivot rod out, and detach the lift rod. Keep small parts in a cup so they do not fall into the cabinet.Loosen mounting nuts and lift out the faucet
Under the sink, loosen the mounting nuts that secure the spout and handle valves. A basin wrench often works best. Once hardware is removed, lift components out from above.Clean the surface thoroughly
Remove old silicone or putty residue. Mineral buildup around holes should be scraped gently and wiped clean. A clean surface helps gaskets sit evenly and prevents slow seepage under escutcheons.
5. Install the Spout Correctly
A stable spout is the foundation of a solid widespread faucet installation.
Position the gasket or apply sealant
Many spouts include a base gasket designed to seal without putty. If your model requires sealant, apply a thin, continuous bead under the spout base. Avoid thick layers, which can prevent the base from sitting flat and may squeeze out, attracting dirt.Insert the spout into the center hole
From above, place the spout through the center hole. Align it so it faces straight toward the basin. Use a straightedge along the back edge of the sink deck if you want a consistent alignment.Secure from underneath
Install the washer and locknut under the deck. Hand-tighten first. Then tighten gradually while keeping the spout centered. Uneven tightening can cause the spout to rotate off-center. Over-tightening can deform gaskets and create small gaps.Confirm spout stability
Gently try to move the spout. It should not rock. If it shifts, loosen slightly, re-center, and tighten again evenly.
6. Install the Handle Valves and Trim
The handle valves must sit vertical and flush to keep operation smooth and prevent trim seepage.
Insert the hot and cold valves
Place each valve body into its hole. Ensure hot is on the left and cold is on the right when facing the sink. Keep the valve’s orientation correct so handle movement matches expected direction.Seat escutcheons evenly
Place the escutcheon and gasket from above. The trim should sit flat on the sink deck. If it rocks, debris is likely trapped underneath or the deck is uneven. Fix this before tightening.Tighten mounting hardware underneath
From below, install washers and locknuts. Tighten evenly. If you crank one side fully before the other, the valve can tilt. A tilted valve often causes handle wobble and uneven trim gaps.Install the handles
Attach handles to the valve stems. Align the off position so both handles appear symmetrical. Tighten set screws securely but avoid stripping threads.
7. Connect the Water Lines Without Creating Stress
Hose routing is critical. Many long-term leaks happen because the hoses are twisted, kinked, or under tension.
Connect valve outlets to the spout body
Follow hot and cold markings. Tighten connections firmly. If the connection uses a gasketed coupling, do not wrap thread seal tape unless the instructions require it.Connect supply lines to the shutoff valves
Hand-tighten first, then use a wrench for final tightening. Stop once snug. Over-tightening can crush washers or distort sealing surfaces.Route hoses with gentle curves
Keep hoses away from sharp edges and moving parts. Ensure the loop does not press against the trap or cabinet wall. A stable, relaxed hose route reduces stress at fittings.
8. Install the Drain Assembly If Included
If your faucet kit includes a matching drain, install it carefully because washer order mistakes are a common leak source.
Remove old drain and trap connection
Place a bucket under the trap, loosen the slip nuts, and remove the P-trap. Loosen the drain locknut and lift out the old drain body.Install the new drain flange
Apply a thin ring of plumber putty or silicone under the flange if required. Insert the flange into the sink drain opening and hold it steady.Assemble washers and tighten locknut
Under the sink, install the correct washers in order and tighten the locknut until the drain body is stable. Avoid excessive torque that can damage porcelain or distort rubber washers.Attach pop-up linkage
Insert the pivot rod, connect to the lift rod, and adjust so the stopper seals fully when closed and lifts smoothly when opened.
9. Turn Water On and Perform a Leak Test
A proper test includes static pressure checking and running-water checking. Do not skip this stage.
Open shutoff valves slowly
Slowly open hot and cold valves to pressurize the lines. Opening too fast can cause water hammer and stress fittings.Check every joint using paper towels
Wrap a dry paper towel around each connection: shutoff valve joint, supply line joint, valve-to-hose connections, spout connections, and drain area. Any dampness indicates seepage.Run water for several minutes
Test cold first, then hot. Let water run to flush debris that may have entered during installation. If flow is low, remove and clean the aerator, then flush again.Test handle operation and alignment
Handles should rotate smoothly without grinding. If handles feel stiff, valves may be slightly tilted or over-tightened at the trim level.Final under-sink inspection
Look for slow beads forming on fittings. Many leaks appear only after a few minutes under pressure.
10. Troubleshooting: Fix Problems Without Guessing
| Symptom | Most Common Cause | What to Do |
|---|---|---|
| Slow drip at supply nut | Washer not seated, nut slightly loose | Re-seat connection, tighten gradually, retest |
| Water under escutcheon | Uneven deck, gasket not flat | Remove trim, clean surface, reinstall evenly |
| Spout wobbles | Locknut not tight, spout not centered | Re-center spout, tighten locknut evenly |
| Low flow | Aerator clogged by debris | Remove aerator, flush, clean and reinstall |
| Hot/cold reversed | Lines swapped | Swap supply connections and confirm operation |
| Drain leak | Washer order wrong | Disassemble, confirm washer sequence, retighten |
11. Practical Tips for Project Installations and Procurement
For contractors and project buyers, a faucet is not only a design choice, it affects installation efficiency, callback rates, and long-term customer satisfaction. Consistent machining, reliable sealing surfaces, and stable mounting hardware make installation faster and reduce minor leaks that trigger service calls. Certification coverage also matters for cross-market project approvals and compliance documentation.
If you are evaluating product options for multiple units, reviewing DELICA’s widespread basin faucet lineup can help you match finish style, handle form, and basin compatibility while keeping a consistent installation structure across the project.
Conclusion
Installing a widespread bathroom faucet requires careful preparation, correct mounting sequence, and thorough leak testing. When the spout and valve bodies are aligned, hardware is tightened evenly, hoses are routed without stress, and every joint is tested under pressure, the faucet will provide stable performance and clean aesthetics for long-term daily use. For buyers who need dependable quality control and a professional bathroom presentation, DELICA’s widespread basin faucet series is a practical option for residential upgrades and commercial projects.